Web developers can easily integrate R2R into their projects using the R2R JavaScript client. For more extensive reference and examples of how to use the r2r-js library, we encourage you to look at the R2R Application and its source code.

Hello R2R—JavaScript

R2R gives developers configurable vector search and RAG right out of the box, as well as direct method calls instead of the client-server architecture seen throughout the docs:

r2r-js/examples/hello_r2r.js

const { r2rClient } = require("r2r-js");

const client = new r2rClient("http://localhost:7272");

async function main() {
  const files = [
    { path: "examples/data/raskolnikov.txt", name: "raskolnikov.txt" },
  ];

  const EMAIL = "admin@example.com";
  const PASSWORD = "change_me_immediately";
  console.log("Logging in...");
  await client.login(EMAIL, PASSWORD);

  console.log("Ingesting file...");
  const ingestResult = await client.ingestFiles(files, {
    metadatas: [{ title: "raskolnikov.txt" }],
    skip_document_info: false,
  });
  console.log("Ingest result:", JSON.stringify(ingestResult, null, 2));

  console.log("Performing RAG...");
  const ragResponse = await client.rag({
    query: "What does the file talk about?",
    rag_generation_config: {
      model: "openai/gpt-4o",
      temperature: 0.0,
      stream: false,
    },
  });

  console.log("Search Results:");
  ragResponse.results.search_results.vector_search_results.forEach(
    (result, index) => {
      console.log(`\nResult ${index + 1}:`);
      console.log(`Text: ${result.metadata.text.substring(0, 100)}...`);
      console.log(`Score: ${result.score}`);
    },
  );

  console.log("\nCompletion:");
  console.log(ragResponse.results.completion.choices[0].message.content);
}

main();

r2r-js Client

Installing

To get started, install the R2R JavaScript client with npm:

npm install r2r-js

Creating the Client

First, we create the R2R client and specify the base URL where the R2R server is running:

const { r2rClient } = require("r2r-js");

// http://localhost:7272 or the address that you are running the R2R server
const client = new r2rClient("http://localhost:7272");

Log into the server

Sign into the server to authenticate the session. We’ll use the default superuser credentials:

const EMAIL = "admin@example.com";
const PASSWORD = "change_me_immediately";
console.log("Logging in...");
await client.login(EMAIL, PASSWORD);

Ingesting Files

Specify the files that we’ll ingest:

const files = [
    { path: "examples/data/raskolnikov.txt", name: "raskolnikov.txt" },
];
console.log("Ingesting file...");
    const ingestResult = await client.ingestFiles(files, {
        metadatas: [{ title: "raskolnikov.txt" }],
        skip_document_info: false,
    });
console.log("Ingest result:", JSON.stringify(ingestResult, null, 2));
...
/* Ingest result: {
  "results": {
    "processed_documents": [
      "Document 'raskolnikov.txt' processed successfully."
    ],
    "failed_documents": [],
    "skipped_documents": []
  }
} */

This command processes the ingested, splits them into chunks, embeds the chunks, and stores them into your specified Postgres database. Relational data is also stored to allow for downstream document management, which you can read about in the quickstart.

Performing RAG

We’ll make a RAG request,

console.log("Performing RAG...");
  const ragResponse = await client.rag({
    query: "What does the file talk about?",
    rag_generation_config: {
      model: "openai/gpt-4o",
      temperature: 0.0,
      stream: false,
    },
  });

console.log("Search Results:");
  ragResponse.results.search_results.vector_search_results.forEach(
    (result, index) => {
      console.log(`\nResult ${index + 1}:`);
      console.log(`Text: ${result.metadata.text.substring(0, 100)}...`);
      console.log(`Score: ${result.score}`);
    },
  );

  console.log("\nCompletion:");
  console.log(ragResponse.results.completion.choices[0].message.content);
...
/* Performing RAG...
Search Results:

Result 1:
Text: praeterire culinam eius, cuius ianua semper aperta erat, cogebatur. Et quoties praeteribat,
iuvenis ...
Score: 0.08281802143835804

Result 2:
Text: In vespera praecipue calida ineunte Iulio iuvenis e cenaculo in quo hospitabatur in
S. loco exiit et...
Score: 0.052743945852283036

Completion:
The file discusses the experiences and emotions of a young man who is staying in a small room in a tall house.
He is burdened by debt and feels anxious and ashamed whenever he passes by the kitchen of his landlady, whose
door is always open [1]. On a particularly warm evening in early July, he leaves his room and walks slowly towards
a bridge, trying to avoid encountering his landlady on the stairs. His room, which is more like a closet than a
proper room, is located under the roof of the five-story house, while the landlady lives on the floor below and
provides him with meals and services [2].
*/

Connecting to a Web App

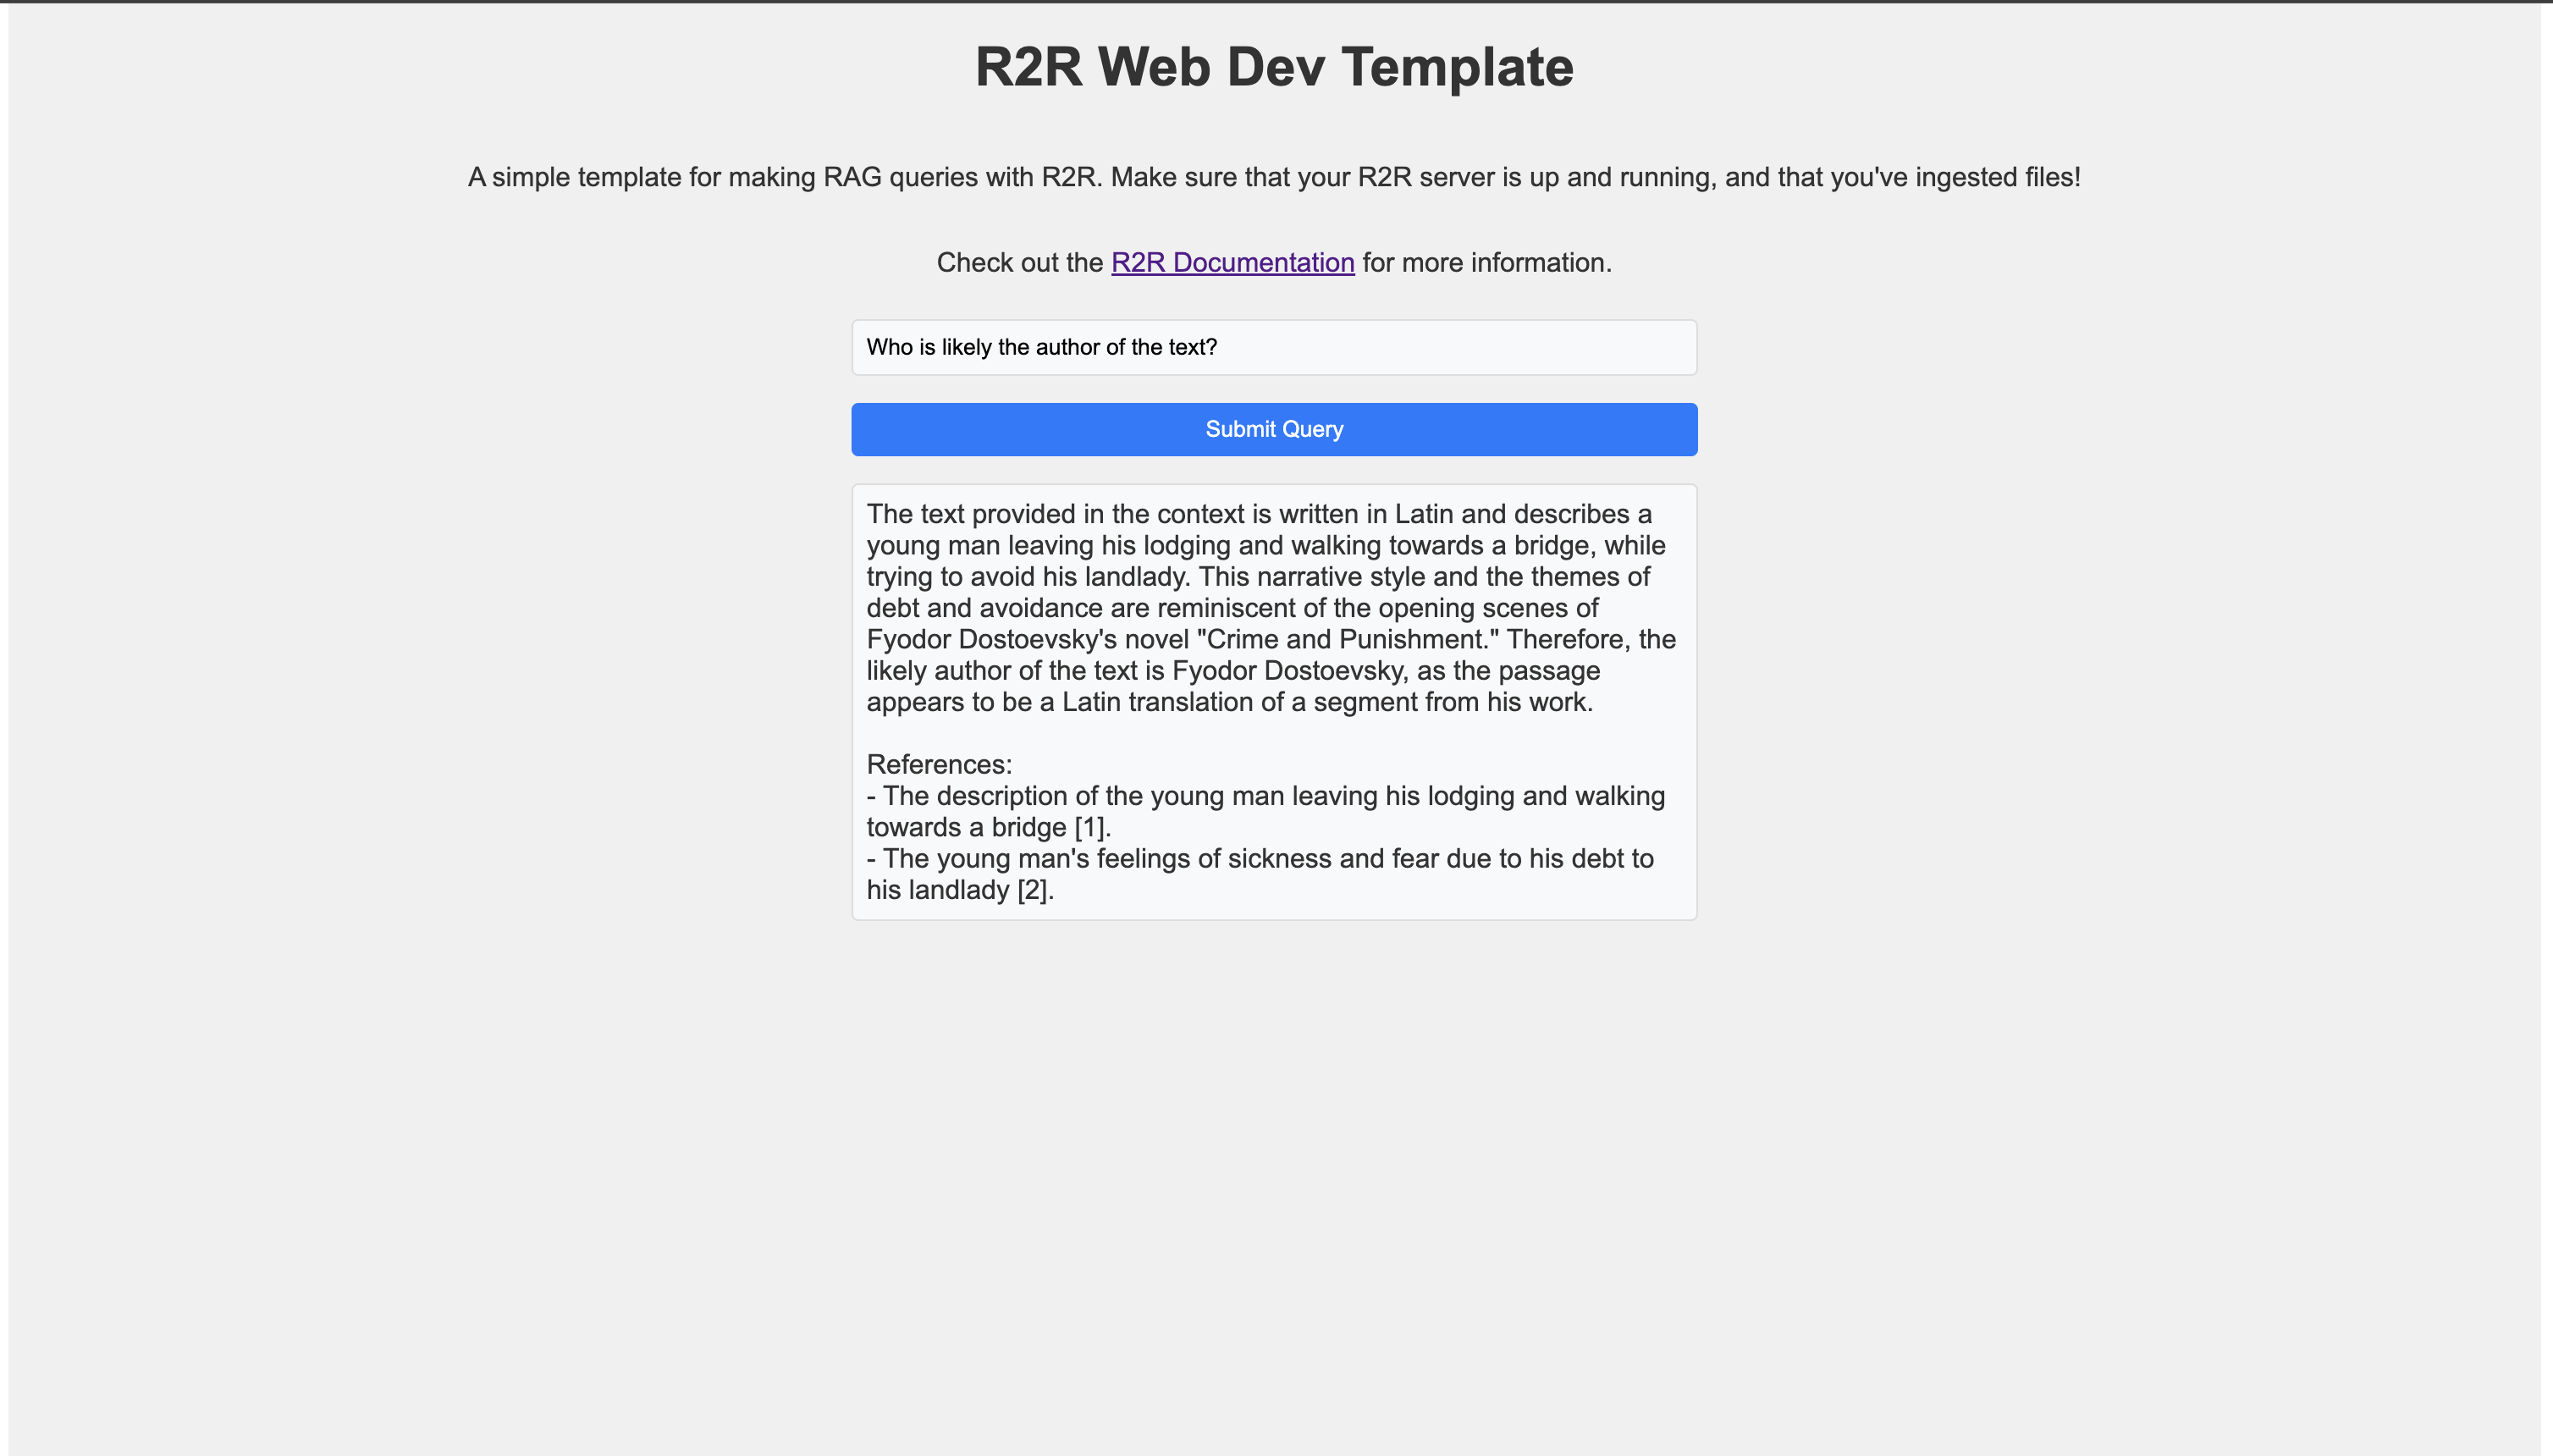
R2R can be easily integrated into web applications. We’ll create a simple Next.js app that uses R2R for query answering. We’ve created a template repository with this code.

Alternatively, you can add the code below to your own Next.js project.
Setting up an API Route

First, we’ll create an API route to handle R2R queries. Create a file named r2r-query.ts in the pages/api directory:

This API route creates an R2R client, logs in, and processes the incoming query using the RAG method.

Frontend: React Component

Next, create a React component to interact with the API. Here’s an example index.tsx file:

This component creates a simple interface with an input field for the query and a button to submit it. When the button is clicked, it sends a request to the API route we created earlier and displays the result.

Template Repository

For a complete working example, you can check out our template repository. This repository contains a simple Next.js app with R2R integration, providing a starting point for your own R2R-powered web applications.

For more advanced examples, check out the source code for the R2R Dashboard.

R2R Web App Template Repository

To use this template:

  1. Clone the repository
  2. Install dependencies with pnpm install
  3. Make sure your R2R server is running
  4. Start the development server with pnpm dev

This template provides a foundation for building more complex applications with R2R, demonstrating how to integrate R2R’s powerful RAG capabilities into a web interface.